Storefront
Build themes, templates, pages, layouts, sections, blocks, breadcrumbs, image transformations, and storefront customisations.
In this guide
- First admin login
- Blocks
- Image factory
- Sections
- Storefront pages
- Breadcrumb
- Themes
- Storefront
- Twig
- Standard pages
- Main layout
- Layouts
- Layout anatomy
- Split listing names
- Product subscriptions
- Install themes
- Items per page
- Available themes
- Theme anatomy
- Custom themes
- Compile theme styles
- Storefront Vue components
- Price list prices
- Featured homepage products
- Subscription implementation
- Contact forms
- Listing header images
- Listing landing pages
- Sashes
- Twig functions
- Storefront sections
- Section parameters
- Image Factory use
- Image Factory options
- Access breadcrumb
- Manipulate breadcrumb
- Slug validators
- Store currency
- Fascia currency
How do I access the admin for the first time?
To access the admin, open the project in your browser and navigate to /admin.
Default login credentials
Use the following login credentials to access the admin for the first time. You'll be prompted to update your details and set a more secure password.
| Password | |
|---|---|
| admin@example.com | aerocommerce |
Custom URL
For added security, the URL path to access the admin can be changed from the default /admin. This can be done by simply setting the slug value in the project's .env file:
AERO_ADMIN_SLUG=iqjwd9809i1e
Introduction to blocks for storefront developers
Whilst the layout of the storefront is dictated by the theme, the displayed content is managed through blocks. This includes navigation (such as header and footer menus), promotional imagery, static text and HTML snippets. Each block can contain multiple items of different types, allowing for features like image carousels and mega menus.
For more information about creating and editing blocks please see "What is a block?".
For more information about using blocks in your storefront please see "How do I display content blocks on the storefront?".
Introduction to image factory
The Aero Image Factory allows you to scale images appropriately and therefore accelerate page load times.
See "How do I use Image Factory?" for more information.
Introduction to sections
Edit once, change everywhere - Sections remove unnecessary code duplication and streamline developer activity.
Sections are reusable chunks of markup and/or code that allow developers to componentise functionality.
Sections allow developers to reduce duplication
When to use Sections - An example
Let's say you want to use image carousels within your eCommerce store. You want carousels on a number of different pages, and multiple carousels on a single page. Rather than repeating identical markup/code, you create a new enter the markup/code in a new 'carousel' section. When you want to add a carousel to a page, simply call the 'carousel' section, passing through different parameters if required.
Section location
All sections are held within your local Aero installation. You can find them here:
resources>views>sections
Default Sections
Aero Themes contain the following sections by default:
- Breadcrumb
- Cookie Bar
- Footer
- Header
- Meta
Introduction to storefront pages
Pages form the core of your Aero Storefront.
Pages are the main structural element of your store. Aero Pages are dynamic, this allows a single page to display various content, depending on customer actions. This makes Aero pages easy to update and low maintenance.
For more information see our section on "storefront pages"
Introduction to the breadcrumb
Aero includes breadcrumb navigation as standard. Breadcrumbs allow users to easily track and access the pages they have visited within your storefront.
See our section on breadcrumbs for more information.
Introduction to themes
Your Theme holds the individual collection of components, visuals and styles that make up your storefront.
Themes ensure consistency within your site. Allowing you to quickly and easily alter the look, without affecting the underlying logic. Themes give you the ability to package-up the look and feel of your storefront to be shared, reused or archived.
See our section on themes for more information
What is the storefront?
Your Aero storefront is your customer facing front-end.
Storefronts are built using a component based structure. This greatly reduces both your development and maintenance effort. Using components allows you to make store-wide changes quickly and efficiently.
A storefront uses a theme to control how the content is displayed. This content can be both static text or dynamic product information. The advantage of using a theme is that it can be easily changed to show a new design - ideal for website re-designs. For more information on themes, see Introduction to themes.
Introduction to twig
Storefront pages are built using the Twig template engine.
Twig is a fast, secure and flexible PHP templating solution. Before developing with Aero, we recommend that you become acquainted with the core concepts of Twig. The official Twig documentation is a great place to start:
Click here for the official Twig documentation
What are the standard storefront pages?
Aero includes the following standard ecommerce pages. These are automatically created when you create a new Aero store:
- Homepage - Your main landing page
- Listings - Product listings based on searches or category selection
- Product - Specific product details
- Cart - The products that a user has selected for purchase
- Search - Search results will point to the listings page
- Information - Static information - E.g. about, returns policy etc
How do I edit the main storefront layout?
As with standard HTML, to rearrange the contents within each area simply reorder the contents in the relevant section or twig file (content).
It is also possible to rearrange the areas of your layout. To do this, reorder the contents of your 'main' layout.
Introduction to layouts
Layouts standardise the look and feel of your Aero storefront.
Layout location
All layouts are held within your local Aero installation.You can find them here:
resources>views>layouts
What makes up the main storefront layout?
By default, all of your pages reference your 'main' layout - this ensures the same scaffolding structure for each of your sections/pages
The 'main' layout calls divides your page into the following screen areas:
- header calls the 'header' section
- breadcrumb calls the 'breadcrumb' section
- footer calls the 'footer' section
- cookie bar calls the 'cookie-bar' section
- content points back to the page (twig file) from which layout was called.
The main layout uses Aero Sections
See our section on sections for more information
How do I give split listings names generated from their attributes?
This code example extends the Aero\Search\Elastic\Documents\ListingDocument document to generate names for split listings from the attributes that the variant is made up of. You can learn more about extending the listing document here.
It’s important to note that you need to reindex for changes to the listing document to take effect. You can reindex using the php artisan aero:search:reindex command. You can learn more about reindexing here.
<?php

namespace Acme\MyModule;

use Aero\Common\Providers\ModuleServiceProvider;
use Aero\Search\Elastic\Documents\ListingDocument;

class ServiceProvider extends ModuleServiceProvider
{
   public function setup()
   {
       ListingDocument::add('search-result', function ($document) {
           if (! $name = $document->getData()['search-result']['name'] ?? null) return [];
           if (! $variant = $document->getModel()->variants->first()) return [];
           if (! $attributeGroups = $document->getModel()->product->attribute_groups_to_split_by ?? []) return [];

           $attributes = $variant->attributes->whereIn('attribute_group_id', $attributeGroups);

           if ($attributes->isEmpty()) return [];

           $attributeNames = $attributes->map->getTranslation('name', $document->getLanguage())->join(' ');

           return ['name' => "$attributeNames $name"];
       });
   }
}
How do I implement subscriptions on the product page?
To implement subscriptions on your product page you’ll need to add some code to your themes product.twig file that allows customers to see the available subscription plans and select the one they want.
The code snippet below provides radio options that will allow customers to select a subscription plan (or select that they would like to make a one-time order if the product doesn’t require a subscription).
<div v-if="has_subscription_plans">
   <div v-for="plan in subscription_plans">
       <input type="radio" name="subscription" :id="'subscription-' + plan.id" @click="selectSubscriptionPlan(plan.id)" :checked="has_selected_subscription_plan && selected_subscription_plan.id === plan.id">
       <label :for="'subscription-' + plan.id">
           <span v-text="plan.name + ' ' + plan.price.inc"></span>
           <span v-if="plan.has_saving_price" v-text="'saving: ' + plan.saving_price.inc"></span>
       </label>
   </div>
   <div v-if="!requires_subscription_plan">
       <input type="radio" name="subscription" id="one-time-order" @click="deselectSubscriptionPlan()" :checked="!has_selected_subscription_plan">
       <label for="one-time-order">
           One-time order
       </label>
   </div>
</div>
How do I install a theme?
Install the Aero Theme components
To install a theme we must first install our theme UI package to the vendor directory of your project by running this command in the root of your project;
composer require aerocommerce/theme-ui --dev
The theme UI package gives you access to a number of themes, our themes require a couple of additional modules to add extra functionality which we'll install next.
Install the required modules
Our themes make use of the listing collections and account area modules to further enhance both the admin and the storefront.
composer require aerocargo/listing-collections aerocommerce/account-area
What's next?
Now we've installed all of the required modules we can move on to;
Listing items per page
Update AppServiceProvider
app>Providers>AppServiceProvider.php
Add the following namespaces:
use Aero\Store\Http\Responses\ListingsJson;
use Aero\Store\Http\Responses\ListingsPage;
use Aero\Store\Http\Responses\SearchJson;
use Aero\Store\Http\Responses\SearchPage;
use Illuminate\Support\ServiceProvider;
Create a setting for per_page
class AppServiceProvider extends ServiceProvider
{
   public function boot()
   {
     ListingsPage::extend($perPages = function ($page) {
            $selected = (int) $page->request->input('per_page', setting('search.per_page'));

            $perPages = collect([24, 48, 96])->map(function ($key) use ($page, $selected) {
                return [
                    'key' => $key,
                    'name' => $key,
                    'selected' => $key === $selected,
                    'url' => rtrim($page->request->fullUrlWithQuery(['per_page' => $key, 'page' => null]), '?'),
                ];
            });

            $page->setData('per_page_options', $perPages);
        });

        ListingsJson::extend($perPages);
        SearchPage::extend($perPages);
        SearchJson::extend($perPages);
   }
}
Listing page variables
Add the following to the variables at the top of your listing.twig file
{% set variables = {
    per_page_options: per_page_options,
} %}
Listing page snippet
Add the following inside the component tags of the listing.twig file
<ul>
    <li v-for="per_page in per_page_options" :key="per_page.key">
        <a :href="per_page.url"
           @click.prevent="updateWithoutScroll(per_page.url)"
           class="w-full flex items-center p-3 space-x-4">
            <span :class="per_page.selected ? 'font-bold' : ''">{{ "{{ per_page.name }}" }}</span>
        </a>
    </li>
</ul>
What are the themes available?
We have a number of official themes available. These themes are designed to be used as a starting point for your project and have been meticulously crafted with conversion, speed and responsive design at their core.
Our official themes are built using Tailwind CSS and can be modified using the tailwind.config.js file and editing the various Twig files.
During the set up of a new Aero store, a theme can be selected and will automatically be installed and configured. To install a theme after this point, please see How do I install a theme?
Phantom
Phantom is our fashion focused theme, it is bold and striking, the use of large imagery keeps the products as the main focus of your store.
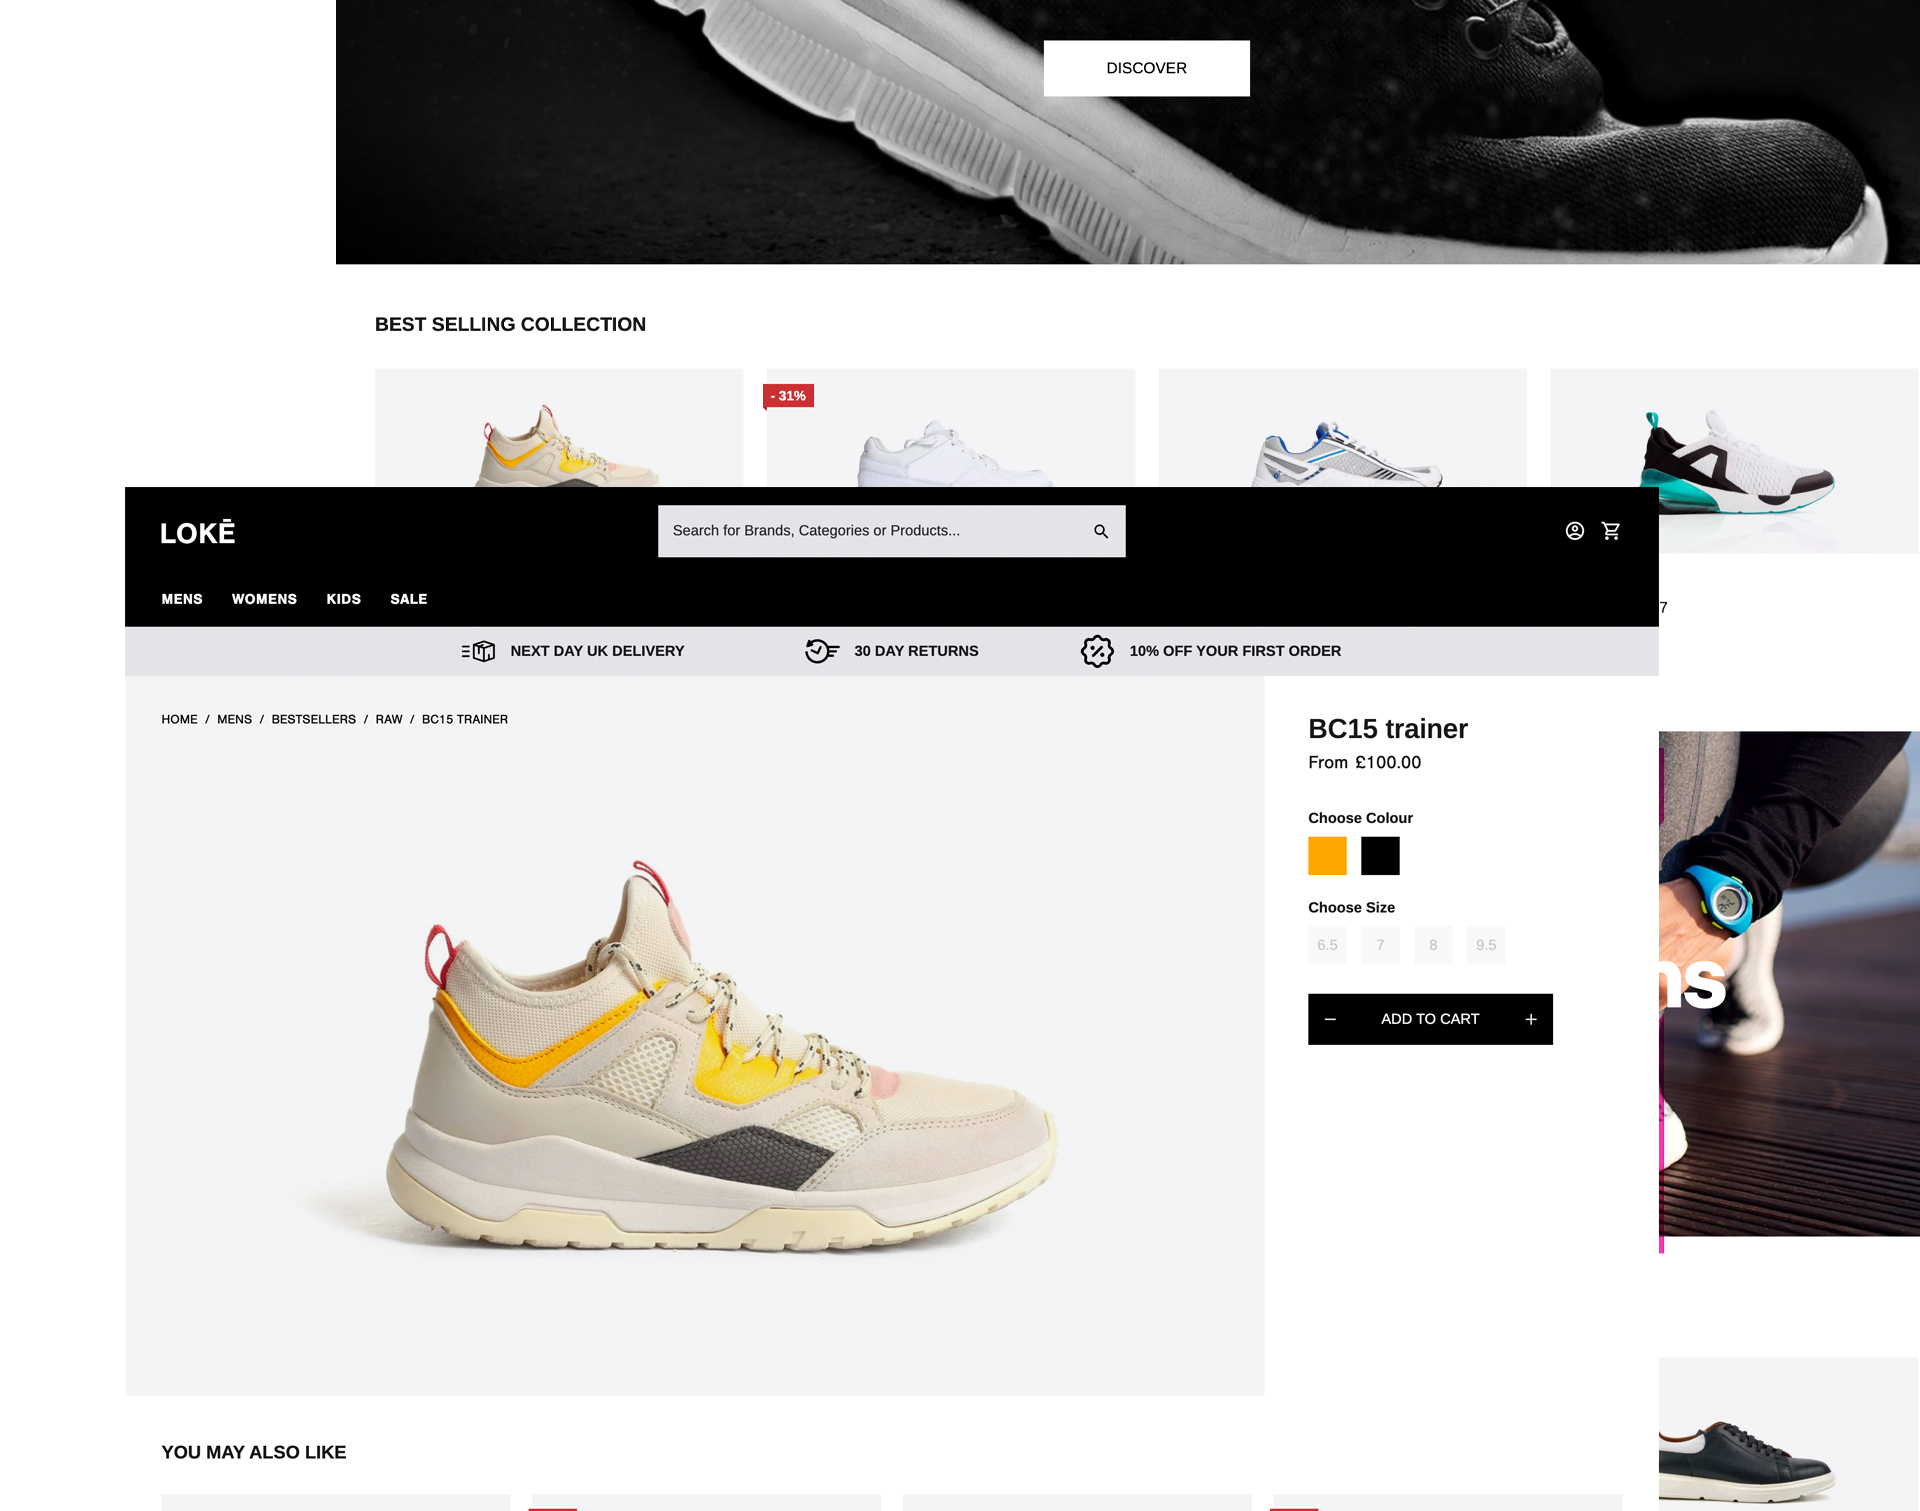
Demo
Our demo store Lokē is built using the Phantom theme;
https://loke.store.aerocommerce.com/
Install
To install the Phantom theme run the following command;
php artisan theme:build your_theme_name --config=vendor/aerocommerce/theme-ui/config/phantom.yml
Shadow
Shadow is our furniture and homewear theme, it is clean and simple to use for the customer and makes great use of whitespace to provide a sense of luxury.
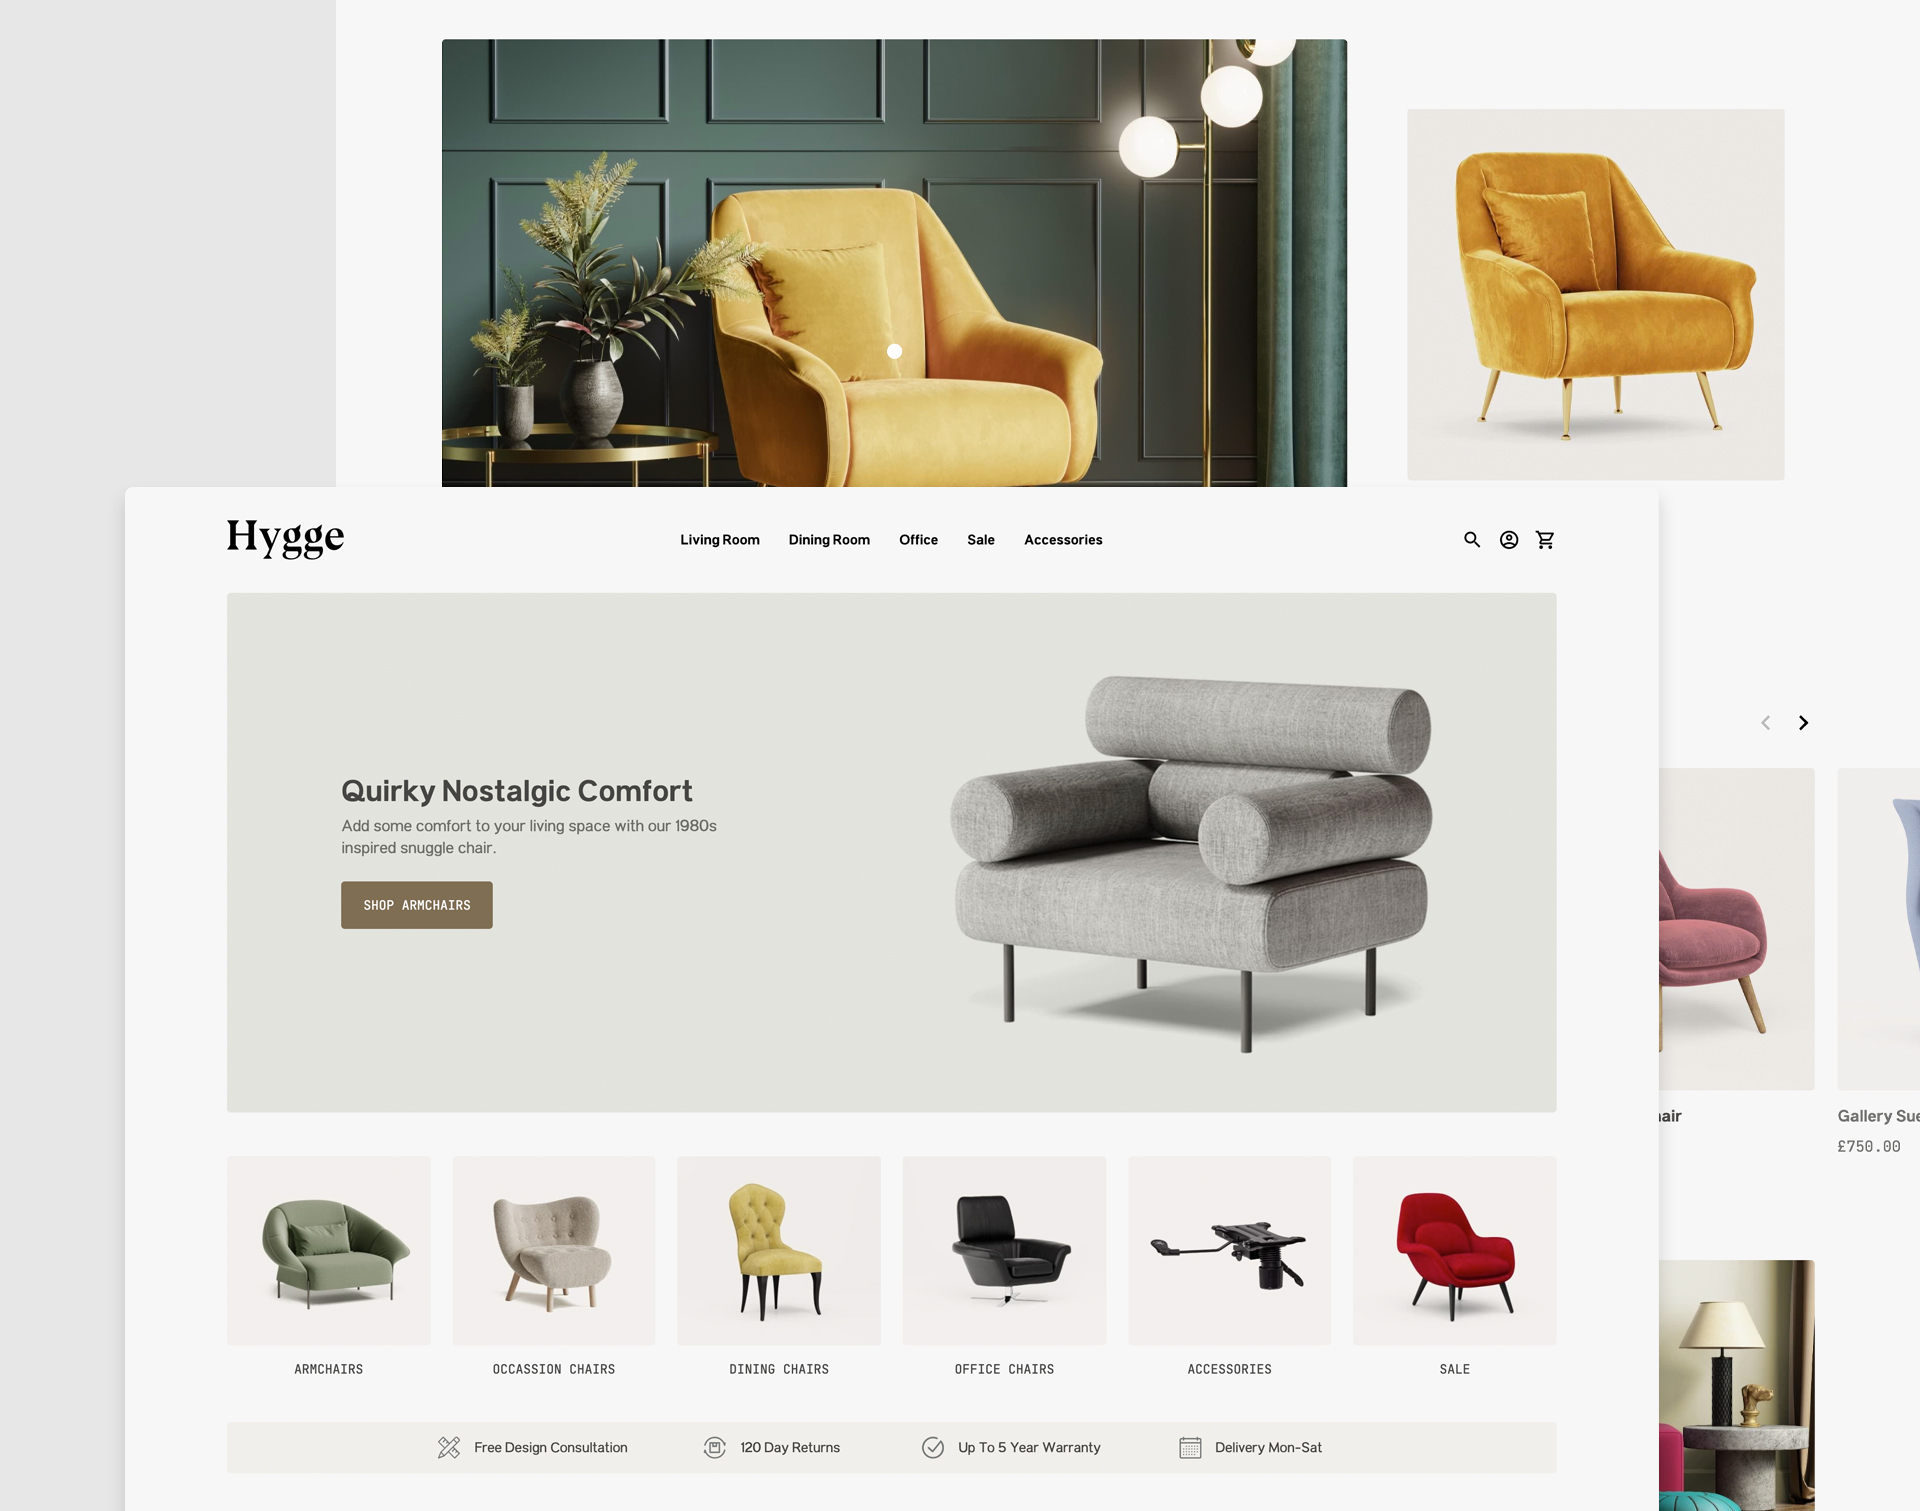
Demo
Our demo store Hygge is built using the Shadow theme;
https://hygge.store.aerocommerce.com/
Install
To install the Shadow theme run the following command;
php artisan theme:build your_theme_name --config=vendor/aerocommerce/theme-ui/config/shadow.yml
Anatomy of a theme
Design system
└─ layout
  └─ page
    └─ section
      └─ snippet
        └─ element
        └─ element
    └─ section
      └─ snippet
        └─ element
        └─ element
      └─ snippet
        └─ element
        └─ element
Elements
Elements are the base level of the Aero design system these can be used for things such as Buttons which don't require other components.
{% element 'example' with {
    key: 'value',
} %}
Snippets
Snippets are a collection of two or more elements which can be used in more multiple places.
{% snippet 'example' with {
    key: 'value',
} %}
Sections
Sections are a collection of two or more snippets and elements which can be used in more multiple places.
{% section 'example' with {
    key: 'value',
} %}
Javascript and CSS
The js and css tag will push any javascript to the bottom of the DOM and css to the top. This allows javascript to be used within sections, snippets and elements without breaking the flow of the DOM.
The CSS tag
{% css %}
    {{ theme_css('example.css') }}
{% endcss %}
The JS tag
{% js %}
    <script>
        alert( 'Hello, world!' );
    </script>
{% endjs %}
The once tag
Using the once tag you are able to create a re-usable section without having duplicate stylesheets / javascript.
{% css %}
    {% once 'example' %}
        {{ theme_css('example.css') }}
    {% endonce %}
    {% once 'example' %}
        {{ theme_css('example.css') }}
    {% endonce %}
{% endcss %}
{{ theme_css('example.css') }}
How do I create a custom theme?
If you've created a custom .yml config file you can build a theme by referencing it as the --config, for example if you created your file in the root of your project you can run:
php artisan theme:build your_theme_name --config=custom.yml
Additional information
When running the theme build command you will be prompted to run npm run init this will compile your theme styles upon build and is therefore recommended. This will be followed by a prompt to enable the theme, if you choose not to enable the theme this can be done later.
It's possible to confirm these prompts during the install by adding the following options to the end of your command:
| Option | Description |
|---|---|
| -e | Enable the theme |
| -r | Compile styles |
| -er | Enable the theme & compile styles |
For example:
php artisan theme:build your_theme_name --config=vendor/aerocommerce/theme-ui/config/shadow.yml -er
Switching between themes
To switch theme you can do so by adding/updating this line of your .env file:
AERO_THEME=your_theme_name
How do I compile my theme styles?
To compile the styles of your theme you first need to change directory in terminal to your theme folder:
cd your_project/themes/your_theme_name
Compiling your styles
Our themes are built to use npm, the webpack.mix.js file contains the required code to compile tailwind styles into a minified css file.
Development
Running the following command in terminal will constantly watch changes made to your theme and add any tailwind helpers to the main.css file if you add any. This is the best method to use while in development, however the css file size will be much bigger and disrupt your site speeds.
npm run watch
Production
When your project is ready for production you can run this alternative command in your terminal this will minify your styles and remove any unused css from the final build giving you optimal site speeds.
npm run production
How do I use a custom Vue component in the storefront?
This repo (https://github.com/aerocargo/example-vue) shows all of the code required to register your own Vue components for the Storefront.
You need to make your component .vue file(s) and your main .js file that will register all of the components. An example javascript structure can be found here in the repo (https://github.com/aerocargo/example-vue/tree/master/resources/js).
You then need to add the assetLinks function to your modules service provider so that your modules assets are publicly linkable. You then need to register the javascript file using the Aero\Components\Facades\Component facade import method. An example module service provider can be found here in the repo (https://github.com/aerocargo/example-vue/blob/master/src/ServiceProvider.php).
Once you’ve got your files setup you need to build the javascript files. You can do this using npm (npm run dev or npm run production). After this you will be able to use your custom Vue components as described below.
Usage
A custom component can be included in any code contained within the {% component %} Twig tag offered by the aerocommerce/components package:
{% component "product" with {count: 100} %}
<div>
   <example-component :count="count" />
</div>
{% endcomponent %}
To include in a Twig template file outside of the {% component %} tag, or on a page not utilizing the {% component %} tag:
{% vue %}
  <example-component count="100" />
{% endvue %}
To share data between multiple sibling components you can declare the data within the opening Twig tag:
{% vue with {count: 100} %}
<div>
   <example-component :count="count" />
   <another-example-component v-model="count" />
</div>
{% endvue %}
As with Vue.js templates, you should ensure there is only one root element within the Twig tag.
By default, the {% vue %} Twig tag renders the Vue template on the client-side. To make use of server-side rendering, simply specify the ssr option at the end of the opening Twig tag:
{% vue ssr %}
// ...
{% endvue %}

// or

{% vue with {count: 100} ssr %}
// ...
{% endvue %}
How do I display the prices from my price list?
You can display what the sales price was before the price list was applied, how much of a discount the customer is getting, and whether the price they’re seeing is specifically for them (such as a price caused by them being in a specific customer group).
Listings Page Code Snippet
<span v-if="listing.price && listing.price.not_regular_sale_price">
<span class="text-red">
<span v-if="listing.price.not_regular_sale_price && listing.price.price_list_entry && listing.price.price_list_entry.is_for_customer">Your price </span>
<span v-else-if="listing.price.is_reduced && listing.price.is_ranged">Now from </span>
<span v-else-if="listing.price.is_reduced">Now </span>
<span v-else-if="listing.price.is_ranged">From </span>
<span v-html="listing.price.sale_value.inc"></span>
</span>
<span class="block text-xs font-normal">
<span class="line-through" v-html="listing.price.regular_sale_value.inc"></span>
<span class="text-red">
Save
<span v-html="listing.price.price_list_diff_value.inc"></span>
<span v-if="listing.price.price_list_entry.is_decrease && listing.price.price_list_entry.is_percentage"> (<span v-html="listing.price.price_list_entry.display"></span>)</span>
</span>
</span>
</span>
<span v-else-if="listing.price && listing.price.is_reduced">
<span class="text-red">
<span v-if="listing.price.is_ranged" class="text-xs">Now from </span>
<span v-else class="text-xs">Now </span>
<span v-html="listing.price.sale_value.inc"></span>
</span>
<span class="block text-xs font-normal">
<span class="line-through" v-html="listing.price.value.inc"></span>
<span class="text-red"> Save <span v-html="listing.price.saving_value.inc"></span></span>
</span>
</span>
<span v-else-if="listing.price">
<span class="text-xs" v-if="listing.price.is_ranged">From </span>
<span v-html="listing.price.sale_value.inc"></span>
<span v-if="listing.price.not_retail" class="block text-xs font-normal">RRP <span v-html="listing.price.retail_value.inc"></span></span>
</span>
Product Page Code Snippet
<div v-if="has_price">
   <span class="font-semibold" :class="{ 'text-red': is_reduced }">
       <span v-if="not_regular_sale_price && price_list_entry && price_list_entry.is_for_customer">Your price </span>
       <span v-else-if="is_reduced && is_ranged">Now from </span>
       <span v-else-if="is_reduced">Now </span>
       <span v-else-if="is_ranged">From </span>
       <span class="text-xl">{{ "{{ sale_price.inc }}" }}</span>
   </span>
   <span v-if="not_regular_sale_price">Normally {{ "{{ regular_sale_price.inc }}" }} - <span class="text-red"> Save {{ "{{ price_list_diff_price.inc }}" }}</span></span>
   <span v-else-if="is_reduced" class="text-sm">
       <span class="line-through">{{ "{{ price.inc }}" }}</span>
       <span class="text-red"> Save {{ "{{ saving_price.inc }}" }}</span>
   </span>
   <span v-else-if="not_retail" class="text-sm">
       RRP <span>{{ "{{ retail_price.inc }}" }}</span>
   </span>
</div>
How do I add featured products to the homepage of my store?
Listing collections can be used to group products together and display them on specified pages.
Install
Run this command at the root of your project
composer require aerocargo/listing-collections
Create your section
Create the file;
your_theme_name/resources/sections/listing-collection.twig
Add the loop;
{% set collection = listings([{
    "tag_name.en": id
}], 8) %}

{% component "listings" with {listings: collection} csr %}
    <div class="aero-listing-collection">
        <h3 class="aero-listing-collection__title">{{ title }}</h3>
        <ul class="aero-listings grid grid-cols-4">
            <li v-for="listing in listings.data" class="aero-listing">
                {% snippet "listing-card" %}
            </li>
        </ul>
    </div>
{% endcomponent %}
Reference your section where you'd like it to display and pass through the variables, here we'll use the tag name best-sellers this will be referenced in the next step.
{% section "listing-collection" with {
    id: 'best-sellers',
    title: 'Best sellers',
} %}
Tag some products
In the admin create a tag which matches the tag name set previously and tag your products.
Add Swiper to create a carousel (optional)
There's no need to add SwiperJS as the files are included in the boilerplate theme.
Reference the css at the top of your section:
We use the once tag so that swiperjs will not be added to the page multiple times if we have more than one instance of the section
{% css %}
    {% once 'swipercss' %}
        {{ theme_css('swiper.min.css') }}
    {% endonce %}
{% endcss %}
Add the relevant classes to your collection:
{% component "listings" with {listings: collection} csr %}
    <div class="aero-listing-collection">
        <h3 class="aero-listing-collection__title">{{ title }}</h3>
        <div class="aero-listing-collection__carousel swiper-container" id="{{ id }}">
            <ul class="aero-listings swiper-wrapper">
                <li v-for="listing in listings.data" class="aero-listing swiper-slide">
                    {% snippet "listing-card" %}
                </li>
            </ul>
        </div>
    </div>
{% endcomponent %}
Add your JS to the bottom of your section:
We use the once tag so that swiperjs will not be added to the page multiple times if we have more than one instance of the section
{% js %}
    {% once 'swiperjs' %}
        <script src="{{ theme_asset('swiper.min.js') }}"></script>
    {% endonce %}
    <script>
        function initSwiper{{ id | replace({'-':''}) }}(){
            new Swiper('#{{ id }}', {
                slidesPerView: 2,
                slidesPerGroup: 2,
                spaceBetween: 16,
                longSwipesRatio: 0,
                loop: false,
                allowTouchMove: true,
                watchOverflow: true,
                breakpoints: {
                    // @screen lg
                    1024: {
                        slidesPerView: 3,
                        slidesPerGroup: 3,
                        spaceBetween: 16,
                        allowTouchMove: true,
                        pagination: {
                            clickable: true,
                        },
                    },
                    // @screen xl
                    1280: {
                        slidesPerView: 4,
                        slidesPerGroup: 4,
                        spaceBetween: 24,
                        allowTouchMove: true,
                        pagination: {
                            clickable: true,
                        },
                    },
                }
            });
        }
    </script>
{% endjs %}
How to Implement Subscriptions on the Product Page
To implement subscriptions on your product page you’ll need to add some code to your themes product.twig file that allows customers to see the available subscription plans and select the one they want.
The code snippet below provides radio options that will allow customers to select a subscription plan (or select that they would like to make a one-time order if the product doesn’t require a subscription).
<div v-if="has_subscription_plans">
   <div v-for="plan in subscription_plans">
       <input type="radio" name="subscription" :id="'subscription-' + plan.id" @click="selectSubscriptionPlan(plan.id)" :checked="has_selected_subscription_plan && selected_subscription_plan.id === plan.id">
       <label :for="'subscription-' + plan.id">
           <span v-text="plan.name + ' ' + plan.price.inc"></span>
           <span v-if="plan.has_saving_price" v-text="'saving: ' + plan.saving_price.inc"></span>
       </label>
   </div>
   <div v-if="!requires_subscription_plan">
       <input type="radio" name="subscription" id="one-time-order" @click="deselectSubscriptionPlan()" :checked="!has_selected_subscription_plan">
       <label for="one-time-order">
           One-time order
       </label>
   </div>
</div>
How do I add a contact form to my storefront?
Introduction
Forms Location
your_theme_name>resources>views>forms
Any files created inside this directory can be included on a page using {% form "contact" %}
Create a Contact Form
Create your form in the forms location, for example contact.twig:
<form action="{{ route('form', 'contact') }}" method="post">
    {{ csrf_field() }}
    <div>
        <label for="name">Name:</label>
        <input id="name" type="text" name="name" autocomplete="name" required placeholder="First Name" value="{{ old('name') }}">
    </div>
    <div>
        <label for="name">Email Address:</label>
        <input id="email" type="text" name="email" autocomplete="email" required placeholder="Email Address" value="{{ old('email') }}">
    </div>
    <div>
        <label for="name">Your Message</label>
        <textarea id="message" type="text" name="message" autocomplete="off" required placeholder="Your message">{{ old('message') }}</textarea>
    </div>
    <div>
        <button type="submit">Submit</button>
    </div>
</form>
Session message
{% if session('success') %}
    <div role="alert">
        <span>Your message has been sent.</span>
    </div>
{% endif %}
Redirect to success page (optional)
Add the following to your project in app>providers>AppServiceProvider.php
public function boot()
{
    \Aero\Store\Http\Responses\FormSubmit::extend(function ($builder) {
        if ($builder->form === 'contact') {
            $builder->setRedirect('/success');
        }
    });
}
Create success page
- Log in to the admin and navigate to
/admin/content/pages - Create new page
- Set page name to success
- Add your content
Mail notification
- Log in to the admin and navigate to
/admin/configuration/mail - Create new mail
- Set label to a name of your choice
- Select "System" layout
- Add the email address of the recipient
- Select "Form Submitted" from the event list
- Set this to match your route, in our case contact
- Continue to the next step
- Configure your email
- Set the subject to the subject of your email
- Input the snippet of code that will be outputted in the body of your email (see example below)
- Save
{% for field, value in fields %}
    <p>{{ field }}: {{ value }}</p>
{% endfor %}
Test your email
You'll need to set up a mail server for example when testing locally you could use Mailtrap
Include your form on a contact page
- Log in to the admin and navigate to
/admin/content/pages - Create a new page
- Set the name to what you'd like the title of your page to be
- In the content area add
{% form "contact" %}where you'd like the form to display.
- Save
How to add a header image to your listings page
On a listings page we can pass through an image from the admin using the combination variable in the listings.twig view. The combination is the data model that holds the information for the particular listings page being viewed - since listings can be made up of a category, a manufacturer or both.
We'll output the entire image block:
{{ combination.image_block | raw }}
However we'll need to pass some sizes:
{{ combination.image_block.render({
    sizes: {
        small: {
            width: 360,
            height: 360,
        },
        medium: {
            width: 1024,
            height: 540,
        },
        large: {
            width: 1920,
            height: 900,
        },
    },
}) | raw }}
Finally we can add some styling to our header to create a nice component for our theme (optional):
<div class="aero-listing-header flex flex-col lg:flex-row gap-4 lg:gap-8">
    <div class="aero-listing-header__image w-full lg:flex-1">
        {{ combination.image_block.render({sizes: {small: {width: 360, height: 360}, medium: {width: 1024, height: 540}, large: {width: 1920, height: 900}}}) | raw }}
    </div>
    <div class="aero-listing-header__content">
        <h1 class="aero-listing-header__title text-xl lg:text-3xl">
            <template v-if="search_term">Search for "{{ "{{ search_term }}" }}"</template>
            <template v-else>{{ "{{ heading }}" }}</template>
        </h1>
    </div>
</div>
How do I convert a listings page into a landing page?
Update AppServiceProvider
Add the following namespaces:
use Aero\Catalog\Models\Category;
use Aero\Responses\ResponseBuilder;
use Aero\Store\Http\Responses\ListingsPage;
use Illuminate\Support\ServiceProvider;
use Closure;
Extend the listings page:
class AppServiceProvider extends ServiceProvider
{
   public function boot()
   {
     ListingsPage::extend(function (ResponseBuilder $builder, Closure $next){
        //Get the first slug which is a category
        $category = $builder->slugs->models()->whereInstanceOf(Category::class)->last();

        if ($category) {
            if (($landingPage = $category->additional('landing_page'))
                && ($builder->request->has('categories') || $category->additional('always_landing_page'))) {
                $builder->setView( $landingPage);
                $builder->setData('block_group', $category->additional('block_group'));
            }
        }

        return $next($builder);
    });
   }
}
Create your landing page
Create your landing page twig file for example:
your_theme_name>resources>views>example.twig
Add your additional attributes in the admin
- Log in to the admin and navigate to
/admin/catalog/categories - Select the category you wish to convert to a landing page
- Set your additional attributes against the category:
| Name | Value |
|---|---|
| landing_page | example |
| always_landing_page | true |
| block_group | example |
- Save
Edit your page
Update your example.twig file, you are now able to reference block_group to create custom blocks:
In this simple example, we load the listing page with a loop of blocks set by our block_group example.promos, followed by a loop of our listing-cards.
{% layout "main" %}

{% set variables = {
    categories: categories,
    filters: filters,
    listings: listings,
    search_term: search_term,
    sort_by_options: sort_by_options,
    summary: summary | default(null),
    summary_length: summary | striptags | length,
    summary_all: false,
    description: description,
    heading: heading,
    filters_open: false,
    similar_products: similar_products,
    sortBy: false,
} %}

{% component "listings" with variables %}
    <div data-listings-scroll="">
        {% if block_exists(block_group ~ '.promos') %}
            {% set promos = block_items(block_group ~ '.promos', null, {
                sizes: {
                    small: {
                        width: 168,
                        height: 160,
                    },
                    medium: {
                        width: 227,
                        height: 208,
                    },
                    large: {
                        width: 236,
                        height: 216,
                    },
                },
            }) %}
        {% endif %}
        <div class="aero-promos">
            {% for promo in promos %}
                <div class="aero-promo">
                    {% if block_exists(block_group ~ '.promos') %}
                        <div class="aero-promo__image">
                            {{ promo | raw }}
                        </div>
                    {% endif %}
                </div>
            {% endfor %}
        </div>
        <template v-if="listings.data.length">
            <template v-for="listing in listings.data">
                {% snippet "listing-card" %}
            </template>
        </template>
    </div>
{% endcomponent %}
How to add sashes to your listing card / product page
There are several ways to achieve this feature. We'll highlight a few below.
Method 1: Using tags
Assigning a tag group for use as "sashes" will allow you to bulk tag many products so that they have the same sash.
Update AppServiceProvider
Add the following namespaces:
use Aero\Catalog\Models\Tag;
use Aero\Catalog\Models\TagGroup;
use Aero\Common\Facades\Settings;
use Aero\Search\Elastic\Documents\ListingDocument;
Create a setting for your tag_sash id and extend the listings document:
class AppServiceProvider extends ServiceProvider
{
   public function boot()
   {
     Settings::group('search', function($group){
         $group->eloquent('tag_sash', TagGroup::class);
     });

     ListingDocument::add('search-result', function ($document) {
         if (! setting('search.tag_sash')) {
            return [];
         }

         $listing = $document->getModel();

         $sashes = $listing->allTags
             ->where('tag_group_id', setting('search.tag_sash')->id)
             ->map(function (Tag $tag) use ($document) {
                 return $tag->getTranslation('name', $document->getLanguage());
             })->unique()->values()->all();

         return ['sashes' => $sashes];
     });
   }
}
Listing card snippet
Add the following to your listing-card.twig snippet:
<template v-if="listing.sashes">
   <span v-for="sash in listing.sashes"
         class="aero-product-sash"
         v-text="sash.replace('-', ' ')"></span>
</template>
Set the Tag Sash setting in the admin
- Log in to the admin and navigate to
/admin/settings/manage/search - Set your Tag Sash as the tag collection that you'd like to display as sashes
- Save
Method 2: Using additional attributes
Setting the sash values in additional attributes gives you control over aspects of the sash, for example its colour or position. Don't forget, additional attributes can be set via a bulk action in the admin, which will save time applying these sashes to multiple products at once.
Update AppServiceProvider
Add the following namespace:
use Aero\Search\Elastic\Documents\ListingDocument;
Extend the listing document so that the sash data is available when looping over each listing on the listings page:
class AppServiceProvider extends ServiceProvider
{
   public function boot()
   {
     ListingDocument::add('search-result', function ($document) {
       $product = $document->getModel()->product;

       return [
         'sash' => [
           'text' => $product->additional('sash-text'),
           'colour' => $product->additional('sash-colour'),
         ],
       ];
     });
   }
}
Listing card snippet
Add the following to your listing-card.twig snippet:
<template v-if="listing.sash && listing.sash.text">
   <span class="aero-product-sash" :style="{backgroundColor: listing.sash.colour}" v-text="listing.sash.text"></span>
</template>
How do I create a custom twig function?
Aero can extend Twig to add custom functions that can then be used throughout the shop. To create a custom twig function, we have to access a service provider that is of our concern - e.g. AppServiceProvider or a Service Provider belonging to a module.
In order to create a custom twig function, we have to add the following piece of code to a Service Provider of our choice:
TwigFunctions::add(new TwigFunction('new_function', function () {
        // Handle the function call
}));
Anything within the above function will be processed after new_function() is ran in the frontend.
Twig functions can also be passed values directly from the frontend.
Example:
new TwigFunction('image_factory', static function ($width, $height, $path = '') {
        return new ImageFactory($width, $height, $path);
})
The above twig function requires the width and the height to call another function in the backend responsible for creating an Image Factory.
If instantiated correctly, the function should now be callable by its defined name.
Options and functions
There are a number of options and functions that are readily available by Twig Functions. The usage of these functions can be explained in the official documentation.
How do I use a storefront section?
To use a Section within an Aero page, follow the steps below:
- Step 1 - Within Views, select the page where you are going to add the 'example' Section
- Step 2 - Use the following code to insert the Section into your page:
{% section "example" %}
What are the available storefront section parameters?
Sections can be easily parameterised. This brings more flexibility and removes further duplication.
Using parameters in Sections is quick, easy and powerful. Follow the steps below to create and use a Section:
Step 1 - Adding parameters to the Section file
To add parameters to the Section file, simply replace the data with a parameter name. You don't have to specify or declare the parameters elsewhere in the Section
For example, let's say that within your example.twig file, you are using a 'Splide' carousel as follows:
Before parameterisation:
<div class="splide">
    {% set items = block_items("homepage.carousel", 3, {
        sizes: { large: { width 1124. height: 748} }
    }) %}
</div>
After parameterisation:
<div class="splide">
    {% set items = block_items(block, 3, {
        sizes: sizes
    }) %}
</div>
Step 2 - Using an instance of a Section with parameters
Use the 'with' functionality to include parameters when you call a section.
For example
<div>
    {% section "example" with {block: "homepage.image", width: 1124, height: 748 } %}
</div>
How do I use Image Factory?
The image factory can be called using the image_factory() helper function from within PHP (.php and .blade.php) and Twig (.twig) files. When initializing an instance, the width and height of the resized image must be provided (in pixels).
The image factory outputs a signed URL to the resized image with an embedded validation token. This prevents being able to generate an infinite number of uniquely configured URLs that would drain the resources on the server.
PHP
image_factory(600, 800);
// outputs: https://store.com/image-factory/640fa397eb07791f~600x800

image_factory(600, 800)->path('/images/example.jpg');
// outputs: https://store.com/image-factory/640fa397eb07791f~600x800/images/example.jpg

image_factory(600, 800)->path('/images/example.jpg')->retina();
// outputs: https://store.com/image-factory/632ab6d293827ff6~600x800@2x/images/example.jpg
Twig
{{ image_factory(600, 800) }}
{# outputs: https://store.com/image-factory/640fa397eb07791f~600x800 #}

{{ image_factory(600, 800).path('/images/example.jpg') }}
{# outputs: https://store.com/image-factory/640fa397eb07791f~600x800/images/example.jpg #}

{{ image_factory(600, 800).path('/images/example.jpg').retina() }}
{# outputs: https://store.com/image-factory/632ab6d293827ff6~600x800@2x/images/example.jpg #}
If using the Aero component system (Vue.js template within a .twig file), the image URL can be built by merging the image factory prefix with the JavaScript variable:
Twig/Vue
<div v-if="image">
    <picture>
        <source :srcset="'{{ image_factory(600, 600) }}/' + image.file + '.webp 1x,{{ image_factory(600, 800).retina() }}/' + image.file + '.webp 2x'"
                type="image/webp">
        <img :src="'{{ image_factory(600, 600) }}/' + image.file"
             :srcset="'{{ image_factory(600, 600).retina() }}/' + image.file + ' 2x'"
             :alt="image.alt"
             :key="image.file">
    </picture>
</div>
What are the available options for Image factory?
There are several options that can be used to manipulate the image. These can be chained.
- path
- webp
- retina
- dpr
- flip
- contain
- crop
- upscale
- rotate
- sharpen
- pixelate
- quality
- invert
- greyscale
- placeholder
- options
Path
path($path)
The path option is used to specify the path to the original image within the storage/app/public directory.
Twig
{% set image = listing.images | first %}
<img src="{{ image_factory(150, 300).path(image.file) }}">
PHP
$image = image_factory(150, 300)->path($path);
Alternatively, the path can be provided as the third parameter in the initialisation of the instance:
Twig
{% set image = listing.images | first %}
<img src="{{ image_factory(150, 300, image.file) }}">
PHP
$image = image_factory(150, 300, $path);
WebP
webp()
The webp option is used to serve a .webp (a modern lossless compression) image.
Twig
<img src="{{ image_factory(150, 300).webp() }}">
PHP
$image = image_factory(150, 300)->webp();
Retina
The retina option is used to serve an image that is twice the size (in pixels) of the designated dimensions.
For example, an image generated from image_factory(500, 500)->retina() would result in an image with dimensions 1000px by 1000px.
Twig
<img src="{{ image_factory(150, 300).retina() }}">
PHP
$image = image_factory(150, 300)->retina();
DPR
dpr($scale)
The dpr option is used to scale the image dimensions.
Twig
<img src="{{ image_factory(150, 300).dpr(3.5) }}">
PHP
$image = image_factory(150, 300)->dpr(3.5);
Flip
flip()
The flip option transforms the image by flipping the x-axis.
Twig
<img src="{{ image_factory(150, 300).dpr(3.5) }}">
PHP
$image = image_factory(150, 300)->flip();
Contain
contain()
The contain option keeps the resized image within the dimensional constraints whilst retaining the original aspect ratio.
Twig
<img src="{{ image_factory(150, 300).contain() }}">
PHP
$image = image_factory(150, 300)->contain();
Crop
crop()
The crop option scales the image to the dimensional constraints and removes any overflowing image from the canvas.
Twig
<img src="{{ image_factory(150, 300).crop() }}">
PHP
$image = image_factory(150, 300)->crop();
Upscale
upscale()
The upscale option allows an image to be enlarged above it's real dimensions. By default, the image factory will not resize an image larger than it originally is, however, if you wish to force an aspect ratio, this option can be used.
Twig
<img src="{{ image_factory(150, 300).upscale() }}">
PHP
$image = image_factory(150, 300)->upscale();
Rotate
rotate($angle)
The rotate option rotates the image by the given angle (in degrees counter-clockwise).
Twig
<img src="{{ image_factory(150, 300).rotate(90) }}">
PHP
$image = image_factory(150, 300)->rotate(90);
Sharpen
sharpen($amount)
The sharpen option sharpens the image by the given amount (0 – 100).
Twig
<img src="{{ image_factory(150, 300).sharpen(25) }}">
PHP
$image = image_factory(150, 300)->sharpen(25);
Pixelate
pixelate($size)
The pixelate option applies a pixelation effect to the image with a given size of pixels.
Twig
<img src="{{ image_factory(150, 300).pixelate(5) }}">
PHP
$image = image_factory(150, 300)->pixelate(5);
Quality
quality($percentage)
The quality option sets the quality of the outputted image. The default is 80%.
Twig
<img src="{{ image_factory(150, 300).quality(95) }}">
PHP
$image = image_factory(150, 300)->quality(95);
Invert
invert()
The invert option reverses all colors in the image.
Twig
<img src="{{ image_factory(150, 300).invert() }}">
PHP
$image = image_factory(150, 300)->invert();
Greyscale
greyscale()
The greyscale option turns the image into a greyscale version.
Twig
<img src="{{ image_factory(150, 300).greyscale() }}">
PHP
$image = image_factory(150, 300)->greyscale();
Placeholder
placeholder($values)
The placeholder option returns a placeholder string.
Twig
<img src="{{ image_factory(150, 300).placeholder('#ff000') }}">
PHP
$image = image_factory(150, 300)->placeholder('#ff0000');
By default, this is an encoded inline SVG path, which can be changed by setting a custom resolver:
PHP
\Aero\Store\Services\ImageFactory::setPlaceholderResolver(function ($image) {
    return asset('placeholder.svg');
});
If using a custom resolver, the values passed into the placeholder can then be accessed using the $placeholderValues property:
Twig
<img src="{{ image_factory(150, 300).placeholder({type: 'product', category: 'dress'}) }}">
PHP
$image = image_factory(150, 300)->placeholder(['type' => 'product', 'category' => 'dress']);
\Aero\Store\Services\ImageFactory::setPlaceholderResolver(function ($image) {
    return asset("placeholder-{$image->placeholderValues['type']}.svg#{$image->placeholderValues['category']}");
});
Options
options($options)
The options option allows multiple options to be specificed by calling one method. The individual options can either be passed as separate arguments or as an array.
Twig
<img src="{{ image_factory(150, 300).options('crop', {pixelate: 100}, {quality: 30}) }}">

// or ...

<img src="{{ image_factory(150, 300).options(['crop', {pixelate: 100}, {quality: 30}]) }}">
PHP
$image = image_factory(150, 300)->options('crop', ['pixelate' => 100], ['quality' => 30]);

// or ...

$image = image_factory(150, 300)->options(['crop', ['pixelate' => 100], ['quality' => 30]]);
How do I access the breadcrumb?
To access the breadcrumb on the storefront, use the breadcrumb() function inside Twig files:
<ul class="breabcrumb">
    {% for crumb in breadcrumb() %}
        <li class="crumb">
            {% if loop.last %}
                <span>{{ crumb.name }}</span>
            {% else %}
                <a href="{{ crumb.url }}">{{ crumb.name }}</a>
            {% endif %}
        </li>
    {% endfor %}
</ul>
How do I manipulate the breadcrumb?
The breadcrumb can be manipulated from within a PHP file. Typically, this will either be on an existing Aero route such as the homepage or product page, or a new route that is custom to the project or module.
Adding to the breadcrumb
To add crumbs to the breadcrumb:
\Aero\Store\Facades\Breadcrumb::add(function ($breadcrumb) {
    $breadcrumb->add(new \Aero\Store\Crumb('Name', '/url'));
});
Clearing the breadcrumb
To clear all crumbs from the breadcrumb:
\Aero\Store\Facades\Breadcrumb::clear();
Filtering the breadcrumb
A filter can be specified to control if certain crumbs should be removed from the breadcrumb. The function should return a boolean which indicates if the crumb should be kept:
\Aero\Store\Facades\Breadcrumb::setFilter(function ($crumb) {
    if ($crumb->getName() === 'Foo') {
        return false;
    }

    return true;
});
Disabling the request referer
By default, the product page breadcrumb is built based on the referer. For example, if a customer performs a search for "shirt" and then clicks on a listing result, the breadcrumb on the product page will be:
Home > Search for “shirt” > Casual Shirt
To disable this functionality:
\Aero\Store\Facades\Breadcrumb::dontUseReferer();
Disabling the request
There may be cases (such as an API) where the breadcrumb functionality should not use the request at all:
\Aero\Store\Facades\Breadcrumb::dontUseRequest();
Removing manufacturer from the product page breadcrumb
By default, the product page breadcrumb contains a crumb entry for the manufacturer. To disable this functionality:
\Aero\Catalog\Models\Product::$breadcrumbContainsManufacturer = false;
How do I set a slug validator?
You can control if a collection of slugs is valid or not by setting your own validator:
\Aero\Store\Routing\Slugs::setValidator(function ($slugs, $resolver) {
    if ($resolver !== 'listings') return true;

    if ($slugs->count() < 3 && $slugs->where('model_type', 'tag')->count()) return false;

    return true;
});
How do I change the store currency?
In order to change the store currency, publish the store configuration file:
php artisan vendor:publish --tag aero::store-config
Locate the configurations section of the published config/aero/store.php file and update the currency_code value of the active store configuration.
Ensure the currency_code exists in the currencies database table of the store.
What is a fascia currency and how do I use it?
A fascia currency can be set to render a different currency to the one specified in the store configuration.
Setting the fascia currency
The easiest way to check for and apply the fascia currency is through store middleware. The example snippet below details how to check for the presence of a currency cookie passed with the request.
<?php

namespace App\Http\Middleware;

use Aero\Common\Models\Currency;
use Aero\Store\Http\Middleware\EncryptCookies;

class SetFasciaCurrency
{
    public function handle($request, $next): void
    {
        EncryptCookies::$exceptions[] = 'currency';

        if ($code = $request->cookie('currency')) {
            $currency = Currency::find($code);

            $request->store()->setFasciaCurrency($currency);
        }

        return $next($request);
    }
}
Ensure the currency code exists in the currencies database table of the store.
The middleware class can then be pushed to the store middleware group within the register method of a service provider:
<?php

namespace App\Providers;

use App\Http\Middleware\SetFasciaCurrency;
use Illuminate\Support\ServiceProvider;

class AppServiceProvider extends ServiceProvider
{
    public function register(): void
    {
        $this->app['router']->pushMiddlewareToGroup('store', SetFasciaCurrency::class);
    }
}
If the fascia currency needs to be set when running a console command:
if ($this->app->runningInConsole() && ($currency = env('CURRENCY_CODE'))) {
    $this->app->booted(function () use ($currency) {
        Store::setFasciaCurrency(Currency::find($currency));
    });
}
Additional considerations
- The exchange-rate of the fascia currency is based on the store's default configuration currency.
- If your store theme uses the Aero component system, the fascia currency will automatically be rendered for listings and products. However, if your theme utilises the
range-slidercomponent, you should ensurecurrency('[value]')andcurrency().fascia_exchange_rateare passed through as the formatter and multiplier attributes, respectively. - Any event which is queued and is an instance of
Aero\Events\ManagedEventwill automatically handle re-applying the fascia currency when running from the queue worker. To force rendering the payment currency in mail notifications, use the.basemodifier. For example:{{ order.total_price.base }}.